Ad
Ad
Ad
Author

admin

Browsing

Organizations have started to make their Digital investments over the internet in order to reach their customers using various channels such as Email, Social, Web and SnailMail/Physical Mail. Some of the Marketing Automation tools include Marketing Cloud, Pardot, MailChimp, SilverPop, Marketo, etc. In this article, we will try to go over some of the Terminology/jargon used in the Marketing Cloud. We will also discuss differences between pardot and Marketing Cloud with use-cases at the end of the article.

Salesforce purchased Exact target on June 4th 2013 and renamed it as the Marketing cloud subsequently.

Let us go over some of the common terminology used in Marketing Cloud

1. Data Extension

2. Journey Builder

3. Email Studio

4. Cloud Pages

5. Email Templates

6. Amp Script

7. Contact Builder

8. Segmentation

9. FTP process

10. Marketing Connect

Pardot vs Marketing Cloud:

Through pardot we can only market to our customers who have email. This type of marketing is Single channel marketing and pardot does not support multi-channel marketing. This works great for organizations that had a larger customer base with email addresses. Pardot can also connect to Salesforce CRM to sync with contacts and Leads. Pardot also can track visitors by using cookies and help in providing insights into visitor behavioral tracking.

The marketing cloud provides multichannel marketing such as Email/Social/Web/Mobile/Direct mail/etc. This is best suited for organizations that want to reach their customers through various channels in order to interact with their customers. For example in the eCommerce industry, We can send Email to customers and if they do not respond to email then we can post Ads through social studio and if they do not respond to social media ads then we can send a text over mobile and if there is no response from the customer then as the last option we can send the promotional message through Snail Mail/Direct mail.

In this article, we will try to understand what is a Data extension, various ways to access Data extensions. One of the biggest challenges in learning a new language/Application is understanding the Technical terminology. After reading through this article we should be able to correlate Data extensions to other familiar programming languages.

Data Extension is a placeholder with different field/attributes which can hold data. When compared to other programming languages like oracle you can call it as Table which can hold data. Fields in Data extensions can be compared to Columns in Tables. If you are familiar with Salesforce then you can compare this with Salesforce Custom object with Fields which can hold data. If you are from a non-programming background then think this as a Table in your excel or CSV.

Let us understand how we can access data extensions in Marketing Cloud using Email Studio and Audience Builder.

Option 1: Once you login to the Marketing cloud then click on Email Studio and select Email from the Dropdown. After Selecting Emails then navigate to Subscribers dropdown and click on Data Extensions.

Based on your role in the Marketing cloud you will have the ability to view available Data Extensions or create Data Extensions by using create a button on the top right corner. You can see the screenshot below for visualization purposes.

Option 2: We can also access Data Extensions from Audience Builder and by selecting Contact Builder from the dropdown. After Selecting Contact Builder there would be various Tabs displayed on the page and Navigate to Data extensions to select desired Data Extensions.

 In order to create a new Data Extension from Contact Builder, Select the Data Extensions tab and click on Create on the Top right Corner. You can see the screenshot below for visualization purposes.

Summary: We have successfully learned various ways to access Data extensions in the Marketing Cloud.

In the next article, we will try to cover different types of Data extensions and how to create a Data extension in the Marketing Cloud.

In the previous article, you learned how to access Data extension from Email studio and Audience builder/Contact builder. Let’s Navigate to Data extensions from Email Studio for Creation of Sample Data extension.

Navigation: Click on Email Studio and select Email from the Dropdown. After Selecting Emails then navigate to Subscribers dropdown and click on Data Extensions.

Based on your role in the Marketing cloud you will have the ability to view available Data extensions or create Data Extensions by using create a button on the top right corner. You can see the screenshot below for visualization purposes.

Click on Create and Select Standard Data extension for time being and let us fill other details such as Creation Method(Create from New), Name(Desired Value) and Description(Brief explanation/purpose of Data extension). Mark the Is Sendable field as true as this will help us in sending emails from this data extension. You could mark Is testable field as true if you want to use this data extension for testing purposes.

You can also create a campaign and associate this data extension as well but for this demo, we are skipping that step. Click on Next and you will be on the Data Retention policy page and by default, the value will be off. You can click the Retention setting to On and it will give you multiple options to decide on the number of days the data has to be retained. You can move on to the next step by clicking on the Next button and this will bring up Fields Page. Marketing Cloud provides you with various Field types such as Text, Number, Date, Boolean, EmailAddress, Phone, Decimal, and Locale.

Click on the below link to understand more about different data types in Marketing cloud.

https://help.salesforce.com/articleView?id=mc_es_data_extension_data_types.htm&type=5

Note: Date values generated by the Marketing Cloud use Central Standard Time

You have to select a Primary key on one of the fields and you can also select nullable against any field(other than Primary key field) if you expect the value to be Null. Optionally you can also set a default value against any desired field. Select the desired field from Send Relationship dropdown on Fields page before clicking on the Create button. Click Create button to complete the creation of Data extension in the Marketing Cloud. You will be redirected to the available Data extensions page and validate if the Data extension that you created exists in the List.

We have Successfully Created Data Extension with various field types. In the next article, we will understand various ways to populate Sample data in Data extensions.

In this article, we will learn various ways to load data into Data Extensions and some of the use cases surrounding this. We are using Customer_Form Data Extension that we have created in an earlier article to Load data in the Marketing cloud.

Let us understand various ways to load data into a data extension.

1. Manually Creating Data into Data Extension

2. Import Data into Data Extension

3. Schedule file imports into Data Extensions

4. FTP into Data Extensions

Manually Creating Data into Data Extension:

This process is mostly used when we want to have validate /test our email template using test data that are loaded into Data Extension. For this use case, we will try to manually create records in Data Extension.

Navigation: Login to MC –>Audience Builder –> Contact Builder –>Data Extensions –>Select Desired Data extension/Create Data Extension –> Click on Records.

As said earlier, we are using Customer_Form Data extension to load data. Click on “Add Record” as shown below in the screen.

Enter desired attributes and non-nullable fields into the record before clicking on save. See below screenshot with Sample data created manually in Customer_Form Data Extension.

Import Data into Data Extension:

We will always have business scenarios to load huge volumes of data into Data extensions. These use cases can be achieved by using the Import process in Marketing cloud. You can load multiple records from csv/spreadsheet into Data extension using Import functionality.

In the above(image) Customer_form data extension there is an Import button next to search and above the records. Click on the import button and select Import into Data extension and click ok.

You will be redirected to upload the file as shown below. Drag and drop the desired csv file to upload the file.

Once you upload the desired file then select the Delimiter type as comma and Import type as Add only/ Add and Update/Update Only/Overwrite. For this demo, we are selecting Add only to add the records to data extension. Click Next and it will take us to Configure Mapping screen. You can use Map by Header Row or Map Manually to map the fields on your data extension to csv file as shown below.

Click on Next once you map all the fields and it will redirect us to Review & Create screen. The marketing cloud gives us the ability to notify over email once the upload of data is complete. Click on Finish and you will be shown an Import progress status bar. As part of Customer_form.csv, We have uploaded 4 records into Data extension.

Note: Import process supports files with a maximum size of 20 MB. Anything beyond 20 MB file requires us to use FTP Process which we will cover it in a different article.

In this article lets go through some of the common data import issues that we encounter while loading data. These learnings will help you avoid Import pitfalls and save your time during development or importing of data into Data extensions.

Issue 1: We try to set the field as non-nullable in our data extension and try to import data with null values.

Solution: Before quickly changing the field value to nullable on data extension to fix the issue, analyze your data or business use case if you are ok loading the field as null or populating the data.

Issue 2: No such column name exists in Data extension

Solution:  This is one of the most common errors that is encountered by customers. While importing data you might have selected the data extension field to be mapped based on the header of the file. If there is a column mismatch on your header then you will see this kind of error. Fix your header and re-import the file.

Issue 3: Date Format Issue

Solution: Marketing Cloud supports a wide variety of Date ranges. Go through below article to see supported date formats

https://help.salesforce.com/articleView?id=mc_overview_supported_date.htm&type=5

Note: Times shown in the journey and triggered send tracking information remain in CST regardless of setting.

Issue 4: Date Time field in Marketing Cloud

Solution: In the Marketing cloud, the Date field supports both Date and Date time values. If you specify Date as January 1st, 2019 then MC defaults to 01/01/2019 00:00:00. It would be confusing initially as we have both Date and Date time fields in Sales cloud/salesforce

Issue 5: StartDate issue when bringing in Data to Marketing cloud from other systems

Solution: When you are bringing in data from other systems we commonly have the start date as 01/01/1111 if the component system does not support null in date fields. In Marketing Cloud the Start Date will start from 12/31/1772 00:00:00

Issue 6: EndDate issue when bringing in Data to Marketing cloud from other systems

Solution: When you are bringing in data from other systems we commonly have the End date as 01/01/00 if the component system does not support null in date fields. In Marketing Cloud the End Date could up till 12/31/9999 23:59:59

Issue 7: “Import Validation Error: CaseSensitiveSalesforce Error Id” while loading data into Data extension

Solution: If you have one of the columns starting with Salesforce object id (001/002/003/etc) and the length of the column is 15 digit then you get this kind of error even though it may not be a Salesforce id.  To turn off this validation work with support or add MC as a prefix to records while you work with a support team member.

https://help.salesforce.com/articleView?id=000312821&type=1&mode=1

In this article lets understand some of the nuances involved while loading data from External systems into the Marketing Cloud. Some of the questions that are always asked include how long does it take to load data into Marketing Cloud. As part of the Import process, any data file that exceeds 20 Mb has to be loaded through the File Transfer Protocol(Ftp) process.

Extraction:

The first step includes Extraction of data from sources such as Teradata/Oracle/Vertica into your internal Ftp site. This could take anywhere from few mins to a few hours depending on the file size. In general, always split the file into multiple files if it has got more number of records. It is advisable to have 6 million to 8 million records in each file and the size would be anywhere from 2 gb to 2.5 gb per file. This extraction process/time depends on the environment you are generating. If you are generating in Unix box it could take more time compared to generating in Amazon S3 server. On an S3 server it could take 1 hour to generate 10 files with 80 million rows(8 million per file).

File movement:

After the extraction, We should move the file from our ftp server to SFMC site using Filezilla/Mft process depending on the organization’s internal protocols/process. Depending on the session configuration of Filezilla/Mft process it could take an hour to transfer 20gb of data from Internal ftp server to SFMC. There might be limitations on a number of files that could be transferred with each run(3 to 5 files) depending on the organization’s settings/internal process.

Processing in SFMC:

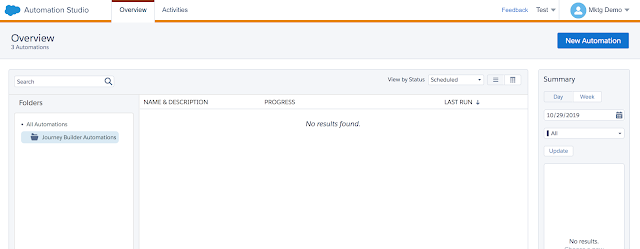
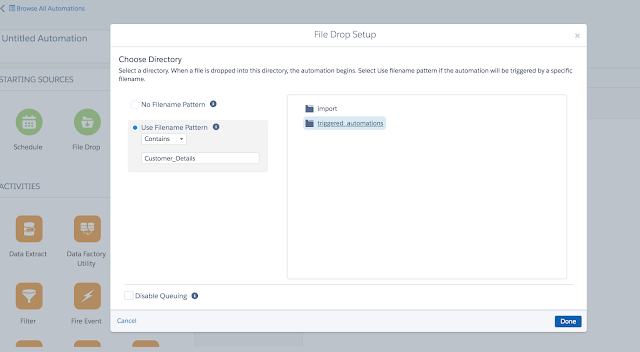
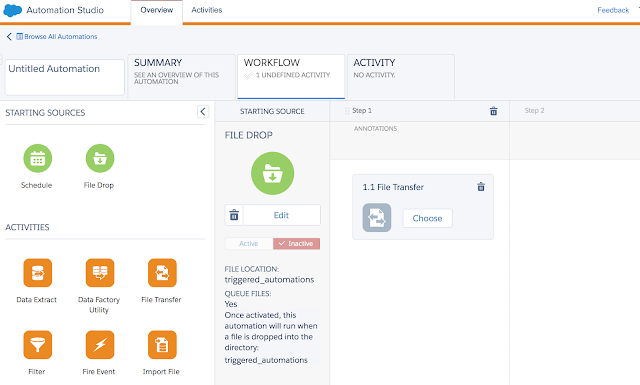
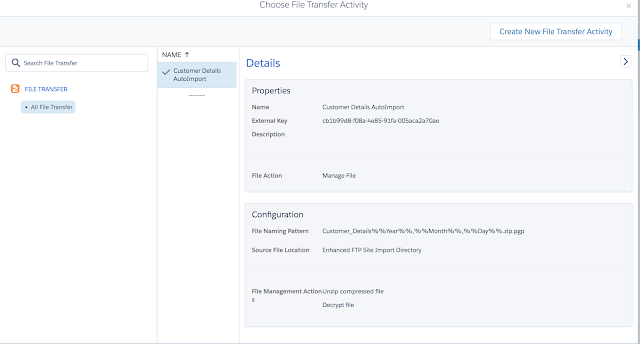
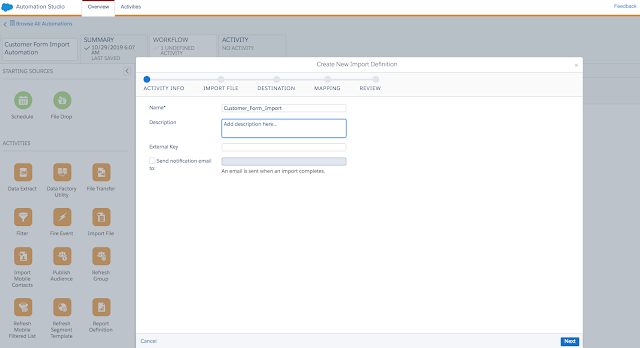
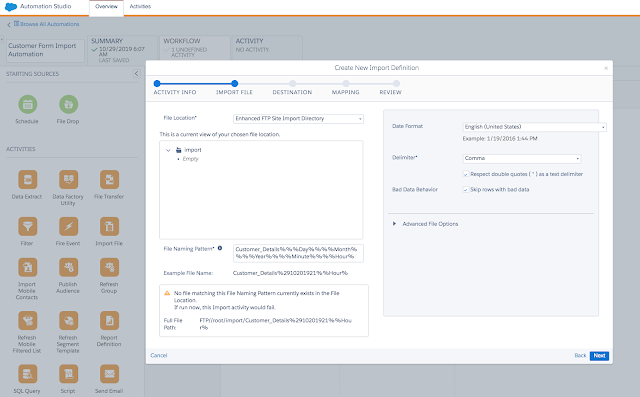
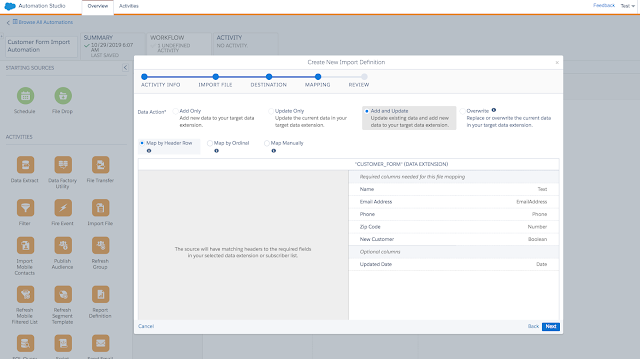
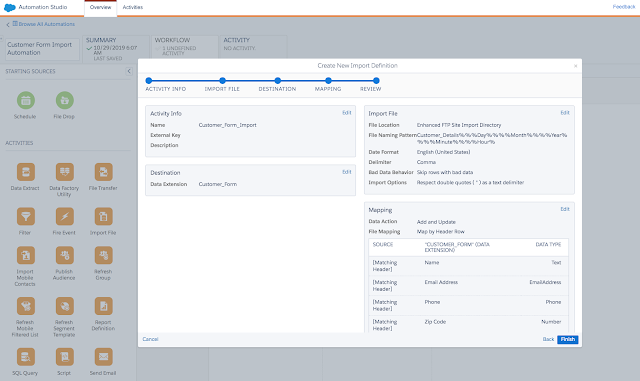
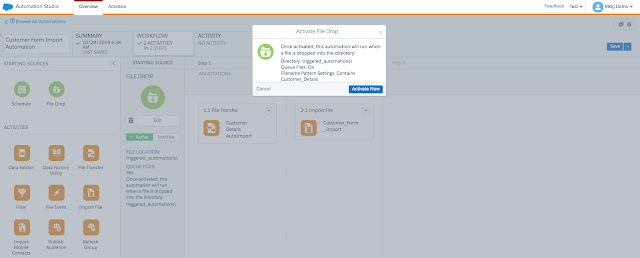
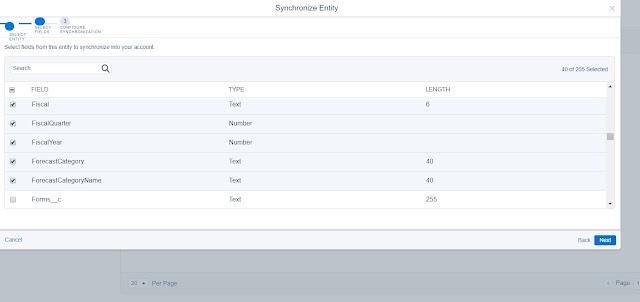
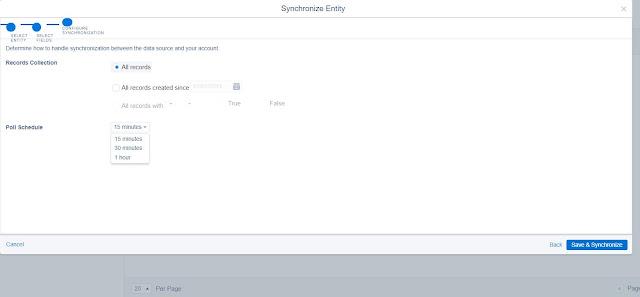
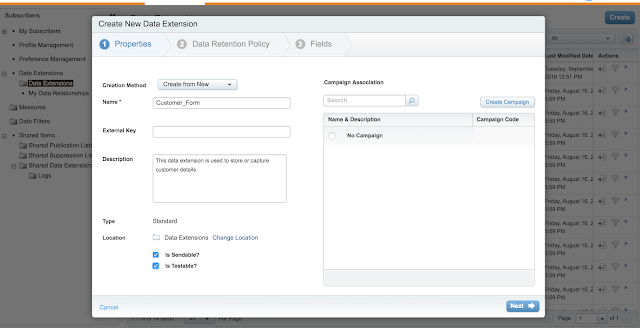
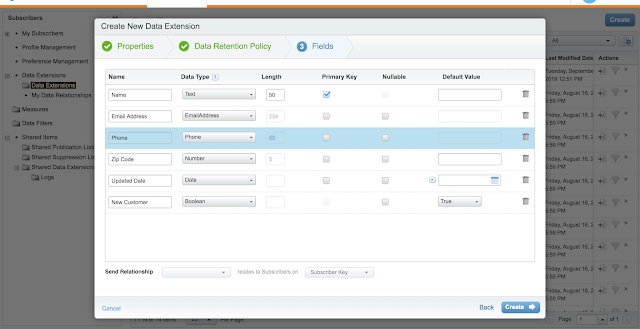
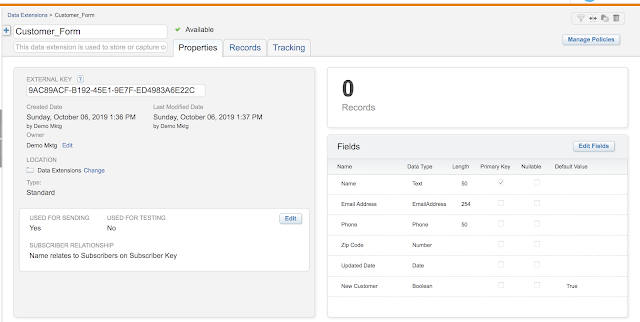
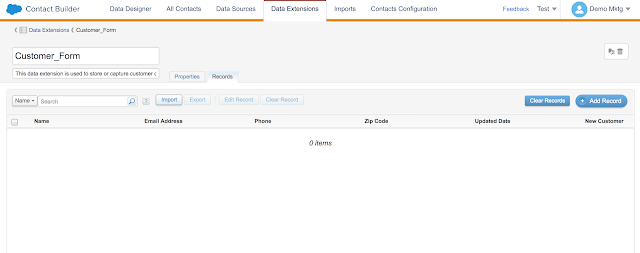
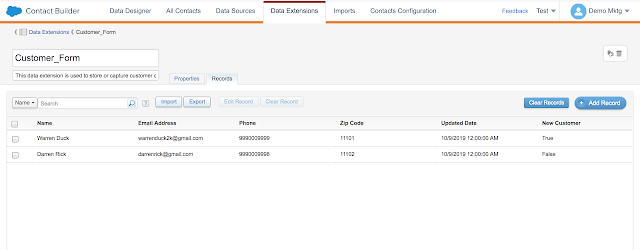
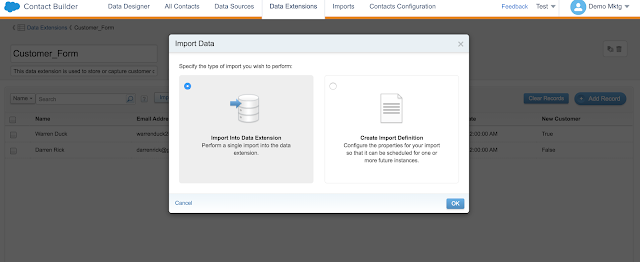
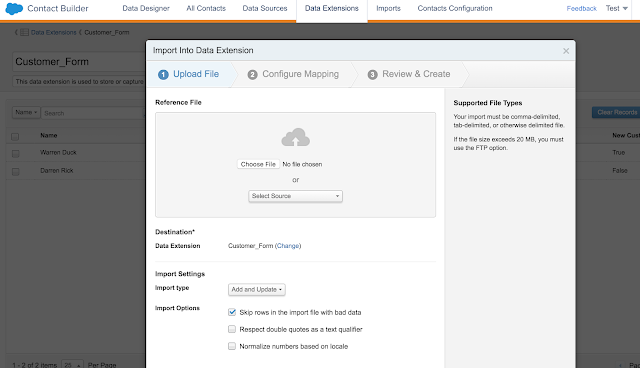
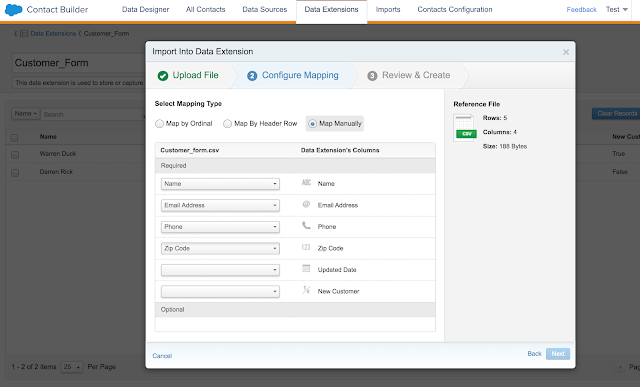
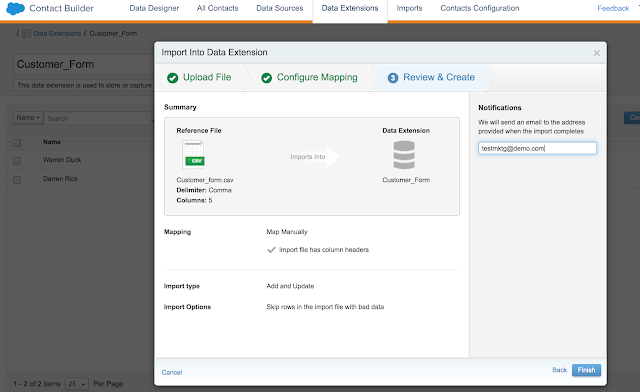
Once the files are moved to SFMC from our internal ftp server, Run the import process to load data into desired Data extensions. Alternatively, we can schedule the import activity to occur once a file is dropped into SFMC. We can map the import activity to load data into Data extensions based on the Column header of the incoming files. This import activity could load 30 million records into data extension in 60 mins. You could monitor this file runs in Automation Studio.

Parallel Runs: SFMC does not support the parallel running of multiple files into the Same Data Extension. I assume it might be having a table lock while one of the file is processing. One Great news is SFMC supports the parallel running of files into different data extensions at once.

Frequently Asked Questions:

1. Can we have one large file instead of multiple files during extraction from Source?

Ans. You could definitely have one large file instead of multiple files. We have extracted 50 gb file and transferred it to SFMC

2. Can we reduce FileZilla/Mft processing times by using smaller files?

Ans. Its advisable to move smaller files quickly through FileZilla/Mft process rather than huge files. It took 3 hours to move 50 gb file(single file) from our internal ftp server to SFMC ftp server

3. Is there any better way to optimize  Extraction and filezilla/mft process?

Ans. In general filezilla/mft process could be designed to look at specific file formats instead of picking all the files(complete/incomplete) from the specified folder. One approach could be generating the file with a different file format so that filezilla/mft process will not pick the file until the file is complete. You could rename it once the file extraction is complete. While mft process is initiated to move to sfmc then start the extraction of other files with a different name and rename this file once the mft process has completed file transfer to sfmc.

4. How long it takes for sfmc to load data into data extension?

Ans. It could load 30 million records in an hour. This could vary based on number of columns

5. Can we load multiple files into Same Data extension in Parallel?

Ans. No, sfmc does not load multiple files into same data extension in parallel. It will queue up and load one after the other

6. Can we load multiple files into different Data extensions in Parallel?

Ans. Yes, sfmc loads multiple files into different Data extensions in parallel.

7. Can we work with Account Executive or Success Manager to Expedite the loads into Marketing Cloud?

Ans. No, Success manager could not expedite your loads into Marketing cloud.

8. Can we monitor files loads at SFMC?

Ans. You can check the file progress in the Automation studio. It will display file status/success/ Errors.

9. How can we view error records in SFMC?

Ans. You will receive an email notification once the import activity is complete with Record counts and attachment in case of errors. Configure the notification to be sent to the Distribution list instead of a single person.

10. Do you suggest partial loads before running full loads?

Ans. It is always advisable to test your file run times and data validations with partial loads(5 percent data) instead of Full loads. Your learnings from partial loads will help you save much more production time(Saving time during Extraction/Load)Note: There are many factors involved while processing files and data and run times provided here are for guidance purposes only as it could change from organization to organization based on network/server capability/Number of columns in a file/etc.

In this article, we will cover the All Subscriber List which is the most important aspect of the Marketing Cloud. A customer or prospect appears in the All subscriber list when they were sent an email for the first time. This contains a master list of all customers/prospects. All subscriber list will contain the subscriber/customer record based on a unique subscriber key when an email was sent for the first time. If you have contactid as the Subscriber key in your org then All subscriber list will contain the record with the Subscriber key that sent the email to the customer/subscriber. If you sent multiple emails for same emailid with different subscriber keys then you will see multiple records in the All subscriber list as your subscriber key is different.

Navigation:

Email Studio –> Email –> Subscribers –> All Subscribers

Frequently Asked Questions:

1. We have sent 3 emails(same email id) with the Same Subscriber key. Will we see 3 records in the All Subscriber List?

Ans. No, you will see only one record which was sent for the first time

2. We have sent 5 emails with different subscriber key for the first time. Will we see 5 records in the Subscriber List?

Ans. Yes if you are sending the emails to your customer/prospect(Subscriber) for the very first time

3. What will happen to All subscribe List when a customer Unsubscribes his/her email?

Ans. When a customer unsubscribes his/her email then the record is marked as Unsubscribed in the All Subscriber List.  Customer/Subscriber is unsubscribed from all Lists and groups.

4. What will happen if the customer/subscriber resubscribes?

Ans.  Customer/Subscriber is readded to the All Subscriber List.

5. We have Multi org with Business Units enabled in the Marketing cloud. Do we have multiple All Subscribers list?

Ans. No, you will have only one All Subscribers list across all Business Units.

6. We have multi org with Business units enabled in the Marketing cloud. What will happen when a customer/subscriber unsubscribes?

Ans.  It depends on the property settings enabled in the Business unit. We have the below options to choose while setting up Business Units.

  • Subscribers will be unsubscribed from all business units in the Enterprise
  • Subscribers will be unsubscribed from this business unit only
https://help.salesforce.com/articleView?id=mc_es_unsubscribe_settings.htm&type=5

7. We have contactid as our subscriber key and our org has duplicate records with a same email address. What will happen to All subscriber list when an email is sent to that customer/subscriber?

Ans. As said earlier All subscriber list will contain the subscriber/customer based on a unique subscriber key when an email was sent for the first time. In this scenario, contactid is the Subscriber id and All subscriber list will contain the record with the Subscriber key that sent the email to customer/subscriber. If you sent multiple emails with different subscriber keys then you will see multiple records in the All subscriber list as your subscriber key is different.

Ex: We have 5 Marc Buffet(markb@salesforce.com) records with different contactids(Remember ContactId is subscriber key) then All subscriber list will contain multiple Mark Buffet records with same email if you sent emails with different contact ids. If you sent one or multiple emails for Mark Buffet with same contact id then you will see only 1 record in the All Subscriber list.

8. We have Email address as Subscriber key and we have duplicate records with the same email address but different First name/last name. What will happen to the All Subscriber list when an email is sent to that customer/subscriber?

Ans. All subscriber list will contain a row/record with the email address for the subscriber when an email is sent. Since the subscriber key is based of Email address, you will see only one row in the All subscriber list eventhough you sent multiple emails

Ex: You have two records with same email address with different first name and last name.

9. We have contactid as our subscriber key and our org has duplicate records with the same email address. What will happen to All subscriber list when a customer/subscriber is unsubscribed?

Ans. When a customer unsubscribes, All subscriber list will be marked with unsubscribed for the contactid(subscriber key) that the customer/subscriber clicked on. Marketing cloud will allow you to send email over duplicate email address as the contactid(subscriber key) is different. Its always important to go back and mark all the records with same email address to be marked as unsubscribed or remove duplicates so that customers/subscribers will not receive emails.

10. We have Email address as Subscriber key and we have duplicate records with the same email address. What will happen to All subscriber list when a customer/subscriber is unsubscribed?

Ans. Once a customer/subscriber clicks on unsubscribe then he will no longer receive emails from the Marketing cloud in future as subscriber key is based of email address.

In this article, We will try to understand various ways to automate the importing of data into Data Extensions using Automation Studio. Some of the business use cases include

1. When you want to load delta every night at a particular time frame or whenever the delta file is placed in the marketing cloud ftp location.

2. We might want to export all the tracking data into third party system from salesforce marketing cloud through nightly jobs

3. Import full data from external systems into the marketing cloud in realtime.

For this Demo, i am using an existing Data extension Customer_Form and we will schedule an Import process to automatically load data into Customer_Form data extension.

Navigation: Marketing Cloud Login –> Hover over Journey Builder tab –> Select Automation Studio

Click on New Automation to create an Automation activity. Our starting sources will be either a schedule or  File drop. For this demo we will use File drop as our starting source.

Click on configure button in the filedrop to provide file naming pattern and select triggered automations as shown below.

Click on Done and select File transfer from Activities

Click on choose from File Transfer and Create New File transfer activity with desired details.

Click on Done and drag Import file from Activities Palette.

Select Choose from Import file and select the existing Import definition or select a new Import Definition.

Click on Next and provide Import file format with the desired name. Select the format as shown so that it autogenerates with date and time which will help to identify the file without duplicates.

Select the desired data extension(Customer_form) from available data extensions and click on Next. In Mapping tab select desired data action such as Add only/Update only/ Add and update only/ Overwrite and Select Map by Header Row/Map by Ordinal/Map Manually.

Review the details and click on Finish.

Click on Activate and this import activity will be triggered whenever there is a new file drop into ftp location.

In this article, we will try to configure Synchronized data extensions into the Marketing Cloud. This is the first step after installing the Salesforce Marketing cloud connect in your Sales cloud/service cloud. Salesforce Marketing Cloud connect is unidirectional sync that loads data from Salescloud /service cloud to the Marketing Cloud. Standard/custom objects that are loaded into the Marketing cloud appear in synchronized data extensions.

As part of this demo, Let us sync Leads from Sales Cloud to Marketing Cloud. Log in to the Marketing cloud and Navigate to Audience Builder and then select the Contact builder from the dropdown.

In the contact builder, select the Data Sources tab and click on Synchronized. Select Setup object on the top right corner and select the desired object.

After selecting the desired object then Select the desired fields to be synced. Some of the standard fields like Id, Record Id will be auto-selected and cannot be deselected.

After selecting desired fields then click on Next to Select Record Collection Options and Poll Schedule. From the Records, collection Select All records to sync all records or select All records created since a particular date or Sync based on Checkbox field or Boolean field. You may not see a checkbox field until you select that field as part of the sync field in your previous step. Also, select the desired Poll Schedule(15 mins/30mins/60 mins) to pull records from Sales Cloud to Marketing Cloud.

Frequently Asked Questions:

  1. Can we change our filter criteria to Sync records from Sales cloud to the marketing cloud after the Initial setup?

Ans. Yes, you can go back and modify your filter criteria to sync records.

  1. Can we add or remove desired fields after initial Sync?

Ans. Yes you can add or remove fields after the initial sync

  1. What will be the synchronized data extension name of Contact after the Sync?

Ans. You will see it as Contact_salesforce as the synchronized data extension name

  1. We have multiple Business Units and connected dev to one of the Business Unit and Production to other Business Unit. What will be my synchronized data extension names?

Ans. If you have multiple Business units and connected Marketing cloud connect to your dev and production then you will see Contact_Salesforce in your Business unit that connected to MC first and Contact_salesforce_1 in other business units that were connected later. Since you have one Marketing cloud with multiple BU’s, the marketing cloud will create a unique name/synchronized Data extension name. It is better to Sync objects in production first rather than Dev.

  1. We want to delete Synchronized data extension as it is no longer required?

Ans. You cannot delete the synchronized data extension once it is setup. You can pause the data extension and data will not flow from the Sales Cloud to the Marketing cloud thereafter.

https://help.salesforce.com/articleView?id=000321152&language=en_US&type=1&mode=1

  1. What is the poll schedule to pull records into Marketing Cloud

Ans. You can select every 15 mins /30 mins/1 hour as a poll schedule to sync records from Sales Cloud to Marketing cloud

  1. Can we delete records from Synchronized data extension?

Ans. No, you cannot delete  records loaded from the Synchronized data extension

  1. We are unable to Sync campaign members from Sales Cloud to the Marketing cloud?

Ans.  There are object dependencies before selecting Junction objects. We need to select/Sync Contact object and Lead Object before Syncing Campaign Member object.

  1. We are unable to see filter/load data based on the Boolean field?

Ans. Select the Boolean field in the list of fields to be synced before filtering records based on the Boolean field.

  1. What happens when we disconnect Synchronized Data Sources?

Ans. Synchronized Data sources remove all Synchronized data extensions, contacts attribute group and Synchronized data source. All the data gets deleted as well.

https://help.salesforce.com/articleView?id=mc_cab_disconnect_synchronized_data_sources.htm&type=5

In this article, we will try to understand Auto Suppression list and when to use it.As the name suggests this List is used to suppress the emails from sending out of the Business unit or across the Enterprise with a Send Classification. Suppression Lists filter out email addresses and prevent those addresses from receiving any email from your organization.

Business Use Case 1: We can use Auto Suppression List when migrating from other Marketing platform to Marketing cloud platform. We can load all the unsubscribed/Do not Email lists into Auto Suppression List.

Business Use Case 2: We can suppress one or multiple Business units from sending Emails while allowing other Business units to send Emails to Customers/Prospects. This is useful while you have acquired a new company and you want to suppress Email at each company level instead of Enterprise Level

Navigation: Login–> Email Studio –>Admin –>Auto Suppression Configuration

Click on Email from Email Studio

Click on Admin Tab and select Auto-Suppression Configuration

Click on Create and Enter desired list name,External key and description.

Mandatory fields: You have to provide Email Address and Date Added while storing a record. You could store other field information by creating new fields on the suppression List.

In the above image we have chosen to apply to All Current and future business units. Alternatively, we could also select “Selected Business Unit(s)” option to select desired Business units. This option is available only in Parent Business unit and is not available in child Business units.

Frequently Asked Questions:

  1. Do Emails in Suppression List count against Email sendable Limits?

Ans. Suppression List does not count against your Email sendable Limits

  1. We were asked to create records in All Subscriber Lists and then mark it as Suppressed?

Ans. You could do that by marking the record as Unsubscribed but those will be counted against your sendable Limits. Best practice is to separate Marketing cloud sends from your Legacy sends by using suppressed Lists.

  1. We have duplicate Emails with unique subscriber key. Will this suppress from sending at email address level or subscriber key level?

Ans. This will stop at Email address level and not subscriber key level. customer/prospect with their email address will not receive any email once it is added to suppression List irrespective of their unique subscriber key

  1. We have created Suppression List and should we be accessing in Automation studio/Journey builder to do the exclusion?

Ans. No you need not add this as a filter criteria to either Automation Studio/Journey builder as the system automatically excludes the emails from sending to Customer/Prospect who are on the suppression List.

  1. How can we load/add records into Suppression Lists?

Ans. You can either add a record manually or use FTP to load data into Suppression Lists by selecting the desired Suppression List.

  1. We are unable to see/select/apply to the desired Business Unit or All Business units?

Ans. You might be in the child Business unit and this option is only available at the Parent Business unit level.