
In this article, we will learn various ways to load data into Data Extensions and some of the use cases surrounding this. We are using Customer_Form Data Extension that we have created in an earlier article to Load data in the Marketing cloud.
Let us understand various ways to load data into a data extension.
1. Manually Creating Data into Data Extension
2. Import Data into Data Extension
3. Schedule file imports into Data Extensions
4. FTP into Data Extensions
Manually Creating Data into Data Extension:
This process is mostly used when we want to have validate /test our email template using test data that are loaded into Data Extension. For this use case, we will try to manually create records in Data Extension.
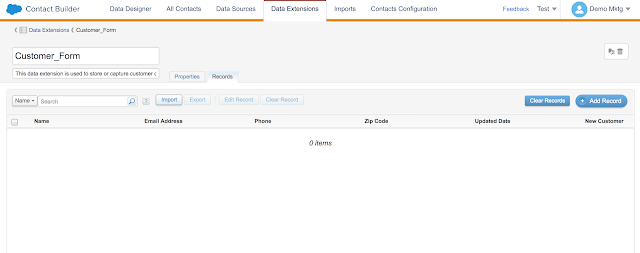
Navigation: Login to MC –>Audience Builder –> Contact Builder –>Data Extensions –>Select Desired Data extension/Create Data Extension –> Click on Records.
As said earlier, we are using Customer_Form Data extension to load data. Click on “Add Record” as shown below in the screen.
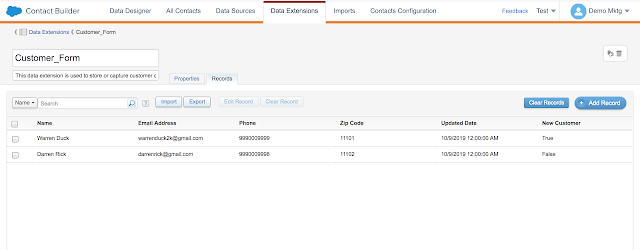
Enter desired attributes and non-nullable fields into the record before clicking on save. See below screenshot with Sample data created manually in Customer_Form Data Extension.
Import Data into Data Extension:
We will always have business scenarios to load huge volumes of data into Data extensions. These use cases can be achieved by using the Import process in Marketing cloud. You can load multiple records from csv/spreadsheet into Data extension using Import functionality.
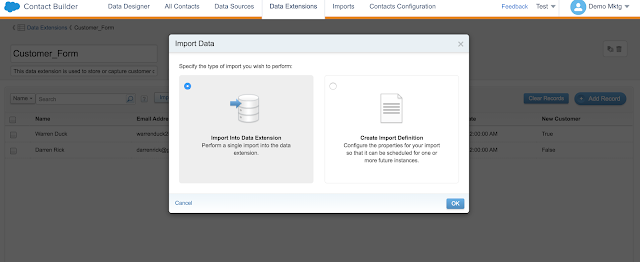
In the above(image) Customer_form data extension there is an Import button next to search and above the records. Click on the import button and select Import into Data extension and click ok.
You will be redirected to upload the file as shown below. Drag and drop the desired csv file to upload the file.
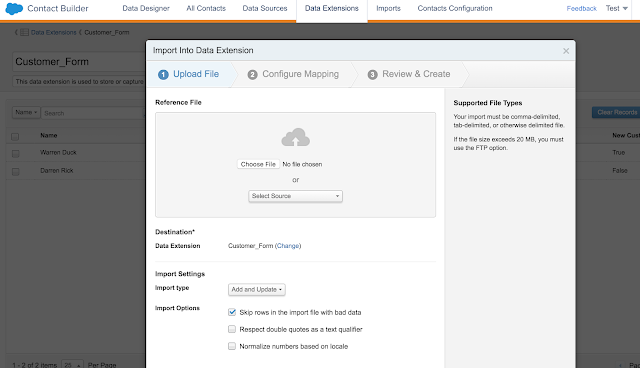
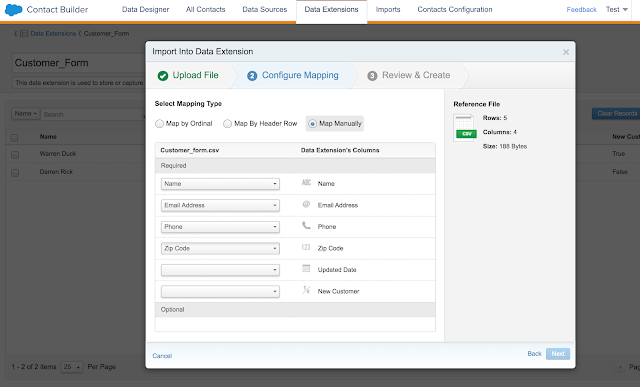
Once you upload the desired file then select the Delimiter type as comma and Import type as Add only/ Add and Update/Update Only/Overwrite. For this demo, we are selecting Add only to add the records to data extension. Click Next and it will take us to Configure Mapping screen. You can use Map by Header Row or Map Manually to map the fields on your data extension to csv file as shown below.
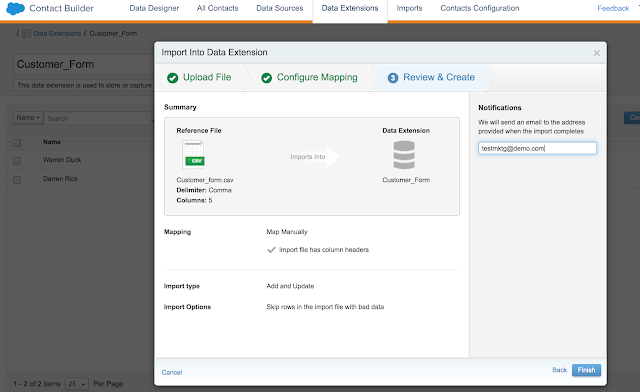
Click on Next once you map all the fields and it will redirect us to Review & Create screen. The marketing cloud gives us the ability to notify over email once the upload of data is complete. Click on Finish and you will be shown an Import progress status bar. As part of Customer_form.csv, We have uploaded 4 records into Data extension.
Note: Import process supports files with a maximum size of 20 MB. Anything beyond 20 MB file requires us to use FTP Process which we will cover it in a different article.