

In this post, We will try to learn to set up JEST unit Testing Framework for Lightning Web Components.
What is Jest ?
Jest is a powerful tool with rich features for writing JavaScript tests. Jest can collect code coverage information and supports mocking to help isolate tests from complex dependencies. Jest tests don’t run in a browser or connect to an org, so they run fast. Use Jest to write unit tests for all your Lightning web components. To run Jest tests for Lightning web components, you need the @salesforce/sfdx-lwc-jest Node module in your Salesforce DX project.
Installing SFDX-Jest
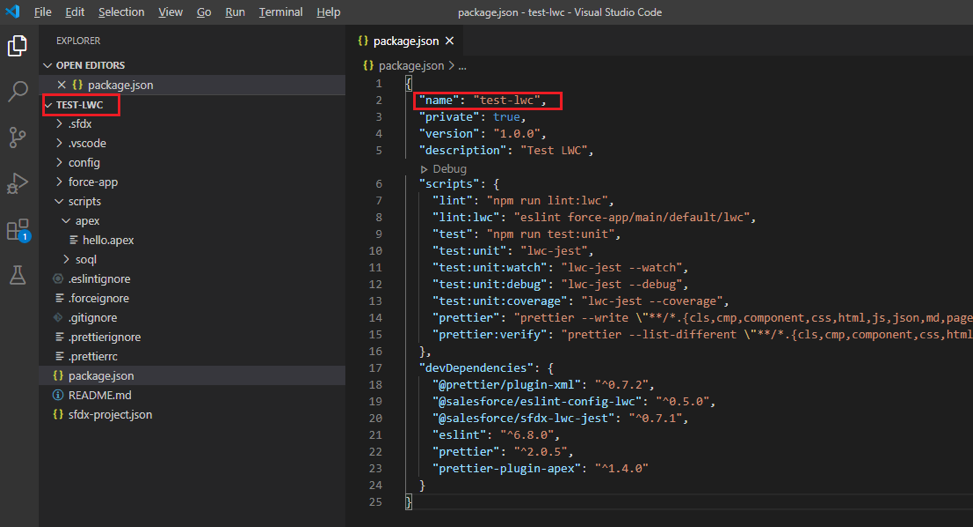
The following JSON is an example of the package.json . Before running the Jest installation setup command from the VSCode Terminal or the node module installation script please ensure that this json file is part of the VSCode SFDX project. The reason I say this is because this json file is parsed when the node module installation script is executed in a MS Windows OS based system.
Note: Always ensure the name attribute on the json matches the project folder name as seen on the Project Explorer in VSCode.
Before issuing the node based scripts, we need to ensure NodeJS is installed in our PC/Laptop. For this ensure you have NodeJS installation done by downloading the Windows equivalent installation file from NodeJs website. For Mac/Linux we can install the same through the terminals directly.
Once you are sure that NodeJS has been successfully installed, issuing the command sfdx force:lightning:lwc:test:setup on the VSCode terminal will result in a couple of warning deprecated details from npm. At times, in some Windows OS based machines we will get an error when this command is executed stating due to vulnerabilities it was not possible to complete the package installation in Windows based machines entirely. However, the screenshot does show that test setup got completed with vulnerabilities observed.

You can also run the script directly from where it was installed in the project using the following Node command. In the Visual Studio Code terminal, in the top-level directory of the Salesforce DX project, enter the following command.
node node_modules/@salesforce/sfdx-lwc-jest/bin/sfdx-lwc-jest
Doing this will setup the node_modules directory locally in the project directory wherever this node modules script is being executed.
While issuing the sfdx command in some of the SFDX projects the absence of the package.json file can result in the sfdx command sfdx force:lightning:lwc:test:setup failing. The error message would signify something like this:

Sometimes we may need to run the following commands in the destined order as mentioned below, to ensure lwc-jest gets installed and setup properly on Windows-based machines.
1st: npm install –global –production windows-build-tools
2nd : npm install @salesforce/lwc-jest –save-dev
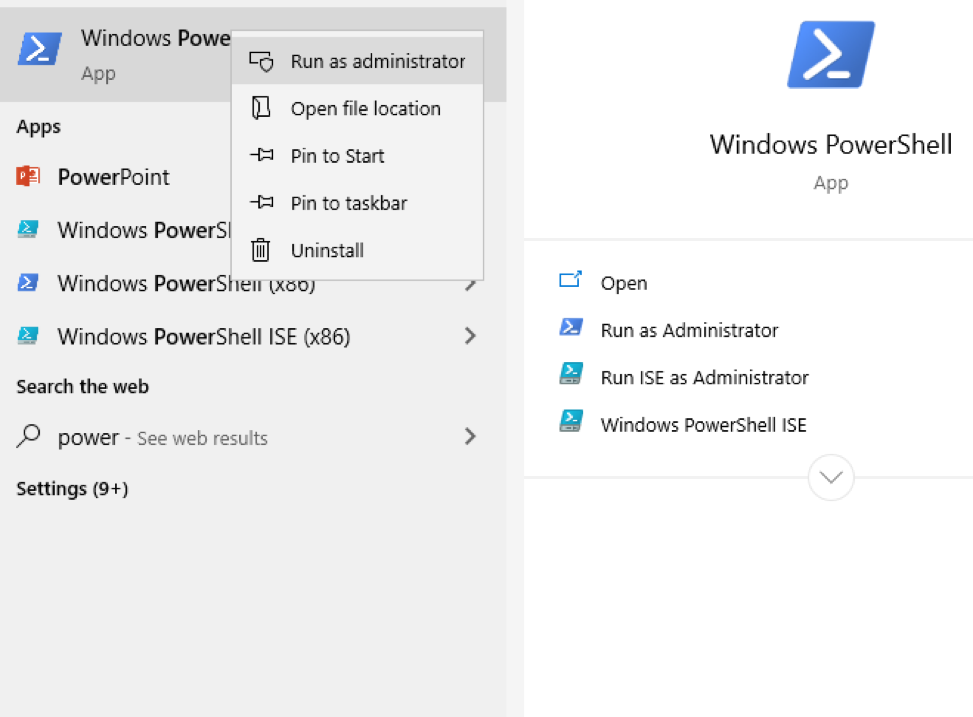
Both the above commands can be run via GiT For Windows Shell or the PowerShell in a Windows based machine. For the above command ensure the PowerShell is run in the Administrator User’s context as follows by clicking on the Start menu button.
This step will ensure that lwc-jest framework has been successfully installed. This issue was faced by me when I was working on the LWC Unit Testing related Salesforce Trailheads. So I thought of covering up this topic on how I managed to fix the issue in this blog.
Automate Test Scripts with Package.json and npm
A goal of having unit tests is to promote developers to write and run them as part of their development and continuous integration process so that bugs are identified and fixed sooner rather than later. Having to remember and type long commands like the one above over and over is counterproductive to your goal. Here’s where automation comes in.
npm has some great out-of-the-box script automation flexibility. Running the install earlier added a series of options to the scripts property of the package.json file at the root of your project.
{
“name”: “test-lwc”,
… “scripts”: {
…
“test:unit”: “sfdx-lwc-jest”,
“test:unit:watch”: “sfdx-lwc-jest –watch”,
“test:unit:debug”: “sfdx-lwc-jest –debug”,
“test:unit:coverage”: “sfdx-lwc-jest –coverage”,
…
},
…}
If you want to run all tests for your project, run this npm command from the base directory of your project.
npm run test:unit
Run Tests Continuously During Development
To run all tests for a single component every time you save changes, change directories to the component directory and run the npm command below that utilizes sfdx-lwc-jest with the –watch parameter. As mentioned above you could also run this from the base of the project and have all tests in the project run for every change. Git needs to be initialized for –watch to work from the command line.
npm run test:unit:watch
With Git initialized, Jest now watches all component files for updates and runs all relevant tests every time it detects a change.
Run Tests in Jest Debug Mode
To run the project’s Jest tests in debug mode, run the npm command below that utilizes sfdx-lwc-jest with the –debug parameter.
npm run test:unit:debug
Run Tests and Display Code Coverage
To see the code coverage of the tests, use the –coverage option below.
npm run test:unit:coverage
Post Contributor:
Rakesh Ramaswamy