


In this article, we will discuss the common errors that are encountered while installing VS Code. There are two steps involved before starting with your first Lightning Web component.
- Installing CLI
- Download Salesforce CLI using the appropriate link for your operating system:
Operating System
Link to Installer
macOS
Windows 32-bit
Windows 64-bit
https://sfdc.co/sfdx_cli_win64
Debian/Ubuntu 64
https://sfdc.co/sfdx_cli_linux
Download the archive from one of the URLs in the manifest, extract the archive, then run the ./install script.
Debian/Ubuntu x86
https://sfdc.co/sfdx_cli_linux_x86
Download the archive from one of the URLs in the manifest, extract the archive, then run the ./install script.
- Run the Installer and open a command line prompt, such as cmd on windows or Linux or Terminal on macOS.
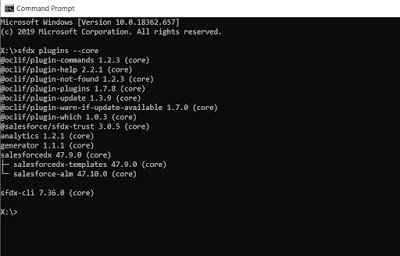
- Run sfdx plugins –core in command line prompt to confirm the installation.

2. Installing VS Code
You could use the link below to install VS Code in your machine.
https://code.visualstudio.com/
There is an exclusive trailhead with the Installation steps.
Common Errors:
- Error: Incompatible Java version(Java 8 or more recent is required to run. Please
download and install a recent JDK).
Install latest version of jdk by checking any of the below links
https://www.oracle.com/java/technologies/javase-jdk13-downloads.html
https://www.azul.com/downloads/zulu-community/
- Error: Salesforce CLI is Not Installed
This is one of the most common errors that most of the user encounters. This could happen because of a couple of reasons.
- You might have missed the installation of Salesforce CLI. If so go back and install Salesforce CLI. You can refer the first section of the article for the steps
- You might have installed 32-bit version of Salesforce CLI and trying to install a 64-bit version of VS Code. Uninstall 32-bit version of Salesforce CLI and install a 64-bit version of Salesforce CLI. Once the 64-bit Salesforce CLI is installed then go ahead and install a 64-bit version of VS Code.
- If you still see the issue after doing the first two steps then check the Path to make sure “Salesforce CLI” is setup in the path.
Go to Window Search–> Type Environment variables–> Open
3. Error: deploying or retrieving source
The file or directory that you tried to deploy or retrieve isn’t in a package directory that’s specified in your sfdx-project.json file. Add this location to your “packageDirectories” value, or deploy or retrieve a different file or directory. For details about sfdx-project.json
This type of error occurs when we do not specify a folder name when we are creating a new project using vscode. To resolve this error create a new folder and use the same folder in VS Code.
4. Error: Unable to load the schema from ‘https://forcedotcom.github.io/schemas/sfdx-project.json/sfdx-project.schema.json’: unable to verify the first certificate.
In order to resolve this error go to your project folder in vs code and select config and replace project-scratch-def.json file with the below code from Github
https://github.com/forcedotcom/schemas/blob/master/sfdx-project.json/sfdx-project.schema.json
Please comment on any other errors in the Comment Section below. I will add it to this list so that other members of the community can benefit from your knowledge.